Archive for February, 2017
Coco-nutty for ice cream
Ah. Puns puns puns puns.
So, right after I decided to be vegan for a week (which wasn’t 100% effective, but still pretty good) I started my time of the month. I wanted ice cream pretty badly. But, Ben and Jerry’s does have a non dairy ice cream option, so I thought I’d try it. Sunday after a production meeting, I ran to Walgreens expecting them to have some, they did not. I decided to google how to make vegan ice cream, and it looked pretty easy.
Now, I have always believed that desserts shouldn’t be healthy, it’s fine to eat healthy most of the time, but it’s completely ok to indulge every once in a while. This ice cream, while vegan, is not really healthy. The base is full fat coconut milk and it does a pretty good job at mimicking a dairy ice cream base.
The recipe I used called for an ice cream machine, which I have. However, I had it churning for a while and it never changed, so I ended up putting it straight into the freezer. This resulted in it being very hard when frozen, but leaving it out of the freezer before serving softens it up just enough.

Here’s what to get from the store:
Full fat coconut milk
Honey or agave
Corn startch
Coconut flakes
Pineapple
Walnuts
Coconut Milk Ice Cream
(From the Kitchen)
2 (13- to 15-ounce) cans full-fat coconut milk
1/2 cup agave syrup, maple syrup, honey, turbinado sugar, or cane sugar
1/4 teaspoon salt
2 tablespoons cornstarch (or 1 tablespoon arrowroot starch)
1 1/2 teaspoons vanilla extract
Optional extras: nuts, chocolate (or carob) chips, fruit puree, cacao nibs, etc.
- Shake the coconut milk: Cans of coconut milk separate into a thick, creamy layer and a thin watery layer on the shelf. Before opening them, shake the cans of coconut milk thoroughly to incorporate the layers.
- Set aside 1/2 cup coconut milk: Open the cans of coconut milk. Measure 1/2 cup and set this aside.
- Pour the coconut milk into a saucepan: Pour the remaining coconut milk into a 2-quart sauce pan.
- Add the sweetener and salt to the coconut milk: Measure the sweetener (agave, maple syrup, honey, or sugar), and add it to the coconut milk, along with the salt.
- Warm the coconut milk on the stove: Warm the coconut milk on the stove over medium-low heat, stirring occasionally, until the sweetener has completely dissolved into the coconut milk, 1 to 2 minutes.
- Whisk the cornstarch into the reserved coconut milk: Measure the cornstarch and add it to the reserved 1/2 cup coconut milk. Whisk thoroughly until the cornstarch is totally dissolved.
- Add the cornstarch mixture to the coconut milk: Pour the cornstarch mixture into the warm coconut milk while whisking gently.
- Heat the ice cream base until thickened: This is your ice cream base. Increase the heat to medium. Stirring occasionally, continue cooking the base until it has thickened enough to coat the back of a spoon, 6 to 8 minutes. Do not allow the base come to a boil.
- Stir in the vanilla: Remove the base from heat and stir in the vanilla.
- Chill the base: Pour the base into a shallow container. Let the base cool slightly on the counter so it’s not hot when you put it in the fridge. Before refrigerating, press a piece of plastic wrap against the surface — this coconut milk base doesn’t form a skin quite as badly as a milk-and-egg base, but it doesn’t hurt! Cover the container and refrigerate for at least 4 hours or for up to 3 days.
- Begin churning the ice cream: Remove the base from the fridge. It should be completely chilled and slightly pudding-like in texture. Pour the base into your ice cream machine and begin churning.
- Churn until the ice cream is the consistency of soft-serve: Churn the ice cream until it thickens considerably and is roughly the consistency of soft-serve ice cream. Depending on your machine, this could take anywhere from 10 to 20 minutes — keep an eye on it! If you want to add any extras, add them now and churn a few more seconds until they are fully incorporated.
- Transfer to freezer container: Scrape the ice cream into your freezer container. Press a piece of parchment or wax paper against the surface to prevent ice crystals from forming.
- Freeze for at least 4 hours: Transfer the container of ice cream to the freezer and freeze for at least 4 hours to harden the ice cream.
- Warm slightly before serving: If your ice cream is too hard to scoop, let it warm a few minutes on the counter before scooping. I find that coconut ice cream melts a little more quickly than milk-based ice creams, so don’t wait too long!
Wednesday it was about 70 degrees outside. I was off so I went to the Lake Front Trail to take a walk. I’ve lived here for 7 months and I hadn’t gone down there yet. It was beautiful. I love this city so much .
Read Full Post | Make a Comment ( None so far )En-CURR-A
Again, I’m hilarious. Get on the pun wagon.
I’ve learned a decent amount in the past few days that I’ve been eating vegan. 1: When I give up cheese and the like, I accidentally give up crabs. 2: I can still control myself at work around cheesy garlic bread (my most favorite thing there) I did slip up today because Kati wanted to get Pho and I had some beef egg rolls with her. I had veggie Pho, however. (I actually like that better)
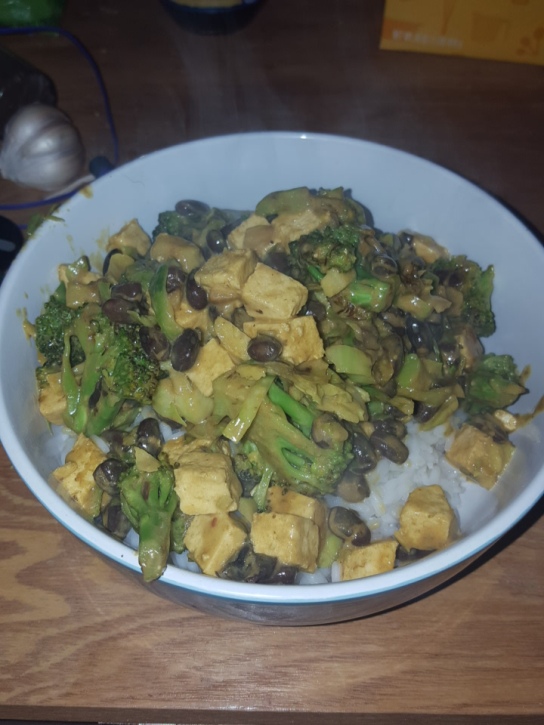
The past 4 days have been extra warm in Chicago. Like, around 40-50 degrees over the norm. Because of that, I’ve been able to pick up extra shifts serving on the patio at work. Yes, we’ve had people eating outside. Last night I got home and was STARVING. I had eaten my salad during work, but you run around for 9 hours, you’re going to be hungry. I had a half of a can of coconut milk left from the satay, and thought I’d do a quick curry. While it was simmering, I realized I needed some sort of carb, so I added rice.
This curry is super easy, full of fiber and protein. When you’re not eating meat, you need to make sure you have enough protein, and what better way than black beans and tofu? The longest part of this recipe will be making the rice, so don’t worry if you’re in a rush.
Here’s what to get from the store:
Coconut Milk
Tofu
Black Beans
Brussels Sprouts
Broccoli
Jasmine Rice
Red Chili Paste
Quick Veggie Curry
1/2 cup cubed tofu
1/4 cup black beans
4 cloves garlic, diced
4 Brussels sprouts, chopped
1/4 cup diced broccoli
1/2 can coconut milk
1/4 tsp red chili paste
Salt, pepper, turmeric, paprika
Cooked Jaime Rice
- Sauté your garlic until mostly cooked, add the broccoli and sprouts, cook until bright green. Add salt and pepper.
- Add the black beans and tofu with some turmeric and sauté until the tofu is browned.
- Add the coconut milk and chili paste and bring to a simmer. Taste to adjust seasonings. Serve over cooked rice.
I’m really glad to have started working more again. I am partially grateful to mother nature for this, but this does make me more concerned for climate change. Even if you don’t believe climate change exists, please be more careful with the environment, it’s the only one we have.
Read Full Post | Make a Comment ( None so far )You Sat-ay right there
I crack myself up guys.
After gaining about 10 pounds in the past 6 months, I had to kick myself in the butt. Part of the gain was because my eating habits, and part of it was drinking. So yesterday I decided to be completely vegan for a week, and to cut down my drinking. Luckily since I eat a mostly vegetarian diet anyway, the only thing I have to really cut out is cheese (tragic) and switch the Greek yogurt in my smoothie to peanut butter.
I had originally wanted to make a stir fry with a Tahini sauce, but when I went to Jewel today and it took me along time to find the Thaini sauce (why was it with the Italian stuff?) that I decided to make peanut satay sauce instead.
I know I’ve probably said this before, but most food from Asian countries is kind of awesome for the vegetarian or vegan lifestyle. They generally don’t have milk so you never have to worry about sauces, and they tend to use a lot more vegetables than we do in Western cultures.
Satay sauce is SUPER easy. It can be a little calorie dense, thanks to it being coconut milk based, but it’s still pretty good and you can choose how much to eat.
Here’s what to get from the store:
Coconut milk
Peanut butter
Red curry paste
Apple Cider Vinegar
Broccoli
Brussels sprouts
Mushrooms
Thai Peanut Satay Sauce
(From Rasa Malaga)
1/2 cp peanut butter
3/4 cp coconut milk
2 tbsp red curry paste
2 tbsp apple cider vinegar
1 tbsp sugar
2 tbsp ground peanut
Salt to taste
- Put everything except the ground peanut into a sauce pan, bring to a boil and stir until combined. Top with the ground peanut.
Veggie Stir Fry
Broccoli, diced
Mushrooms, diced
1 small onion, diced
Brussels sprouts, diced
4 cloves garlic, diced
Tofu, diced
Satay sauce
- Sauté the vegetables until cooked, add as much of the satay sauce as you would like.
I know, these were super easy, but that’s kind of the point. There was a guy on a dating site who said he liked cooking vegetarian because he said it was harder. As someone who does that all the time, I disagree. Cooking without meat makes things a lot easier, vegetables cook a lot faster, and if you do under cook them, they won’t kill you. The most important part about cooking vegetarian or vegan is to use the right spices. Spices are very important for any meal, and they don’t add any calories. Some spices have added health benefits, and there’s nothing wrong with that. 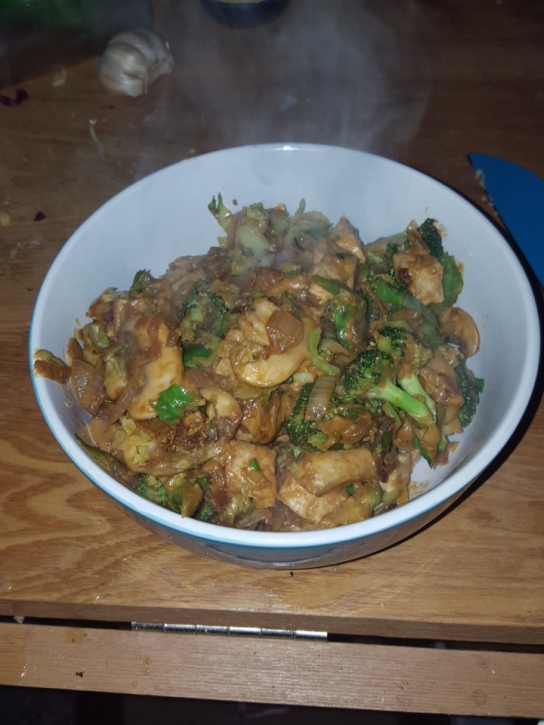
Gimme a Pizza yo Mind
I was originally going to write a post about the pickled red onions I made the other day, but my Domino’s app (don’t judge me, we all have that one awful food we have to have) told me yesterday was National Pizza Day. How could I pass up an opportunity to make pizza?
Kati and I normally hang out on Thursdays so I suggested pizza and said I was going to make it. I came up with a whole wheat crust (which turned into a beer whole wheat crust) with the pickled red onions, and Kati picked mushrooms. Both of us love cheese so there would be no less than 5 cheeses. vc bbbbbbbbbbbbbbbg4aaaaaaaaaaaaaaaaaaaaaaaaaaaaaaaaaaaaaaaaaaaaaaaaaaaaaaaaaa
Above was Batman, he’s not a pizza guy, but Ghost doesn’t like typing. (Yes, crazy cat lady is in full effect this winter)
Now, let’s talk about the red onions that were the star of the pizza. I had been annoyed with Aldi because the only way to buy red onions was to buy them in a bag. I like putting red onions on my salad, but I don’t go through them that quickly to justify buying a bag of them. Last week my parents and I went to MSI for my mom’s birthday. For lunch I had a spinach a bleu cheese salad that had pickled red onions. And it hit me, duh, why not buy the bag of onions and pickle them? Humans have been pickling vegetables for a long time because we didn’t always have fridges or chemicals to keep food from going bad. I had finished 2 jars of my mom’s pickles, and figured why not clean them and use them again? The onions didn’t take long to make and I’ll have onions for my salads for a long time.
The pizza dough itself was pretty easy to make. It’s just the normal dough with some beer added in. I love using beer in baking because not only does it have it’s own yeast, it also adds an extra flavor that most breads don’t have. The recipe I used suggested a dark beer, but I added a wheat beer and I actually liked the flavor.

Here’s what to get from the store:
Whole wheat flour
Beer of your choice
Yeast
Red onion
Apple cider vinegar
Peppercorns
Mozzarella
Sharp cheddar
Asiago
Goat cheese
Parmesan
Whole Wheat Beer Pizza Dough
(From Veggie and the Beast)
2/3 cp room temp beer
2 1/4 tap active dry yeast
1 tsp sugar
2 tbsp. Olive oil, divided
1 tsp sea salt
1 1/2 cp whole wheat flour (plus more for kneading)
- Whisk together the warm beer with the sugar and the yeast. Let sit for 5 minutes, until bubbly and foamy.
- Whisk in 1 tablespoon of olive oil. Pour in 1 1/2 cups flour and the salt. If you have a stand mixer with a knead hook, let it do its thing for 5 minutes. If you don’t, use a wooden spoon to incorporate the flour, then turn out onto a floured surface and knead for 5 minutes. This is the stage where you may need to add a few more tablespoons of flour. It will come together and be more elastic. You want the dough to bounce back when you poke it.
- Transfer the dough to a lightly-oiled bowl and flip it around so the oil coats it fully. Cover loosely with plastic wrap and let it rise in a warm place for 2 hours.
- Turn the dough out onto a parchment-lined surface. Cover with a warm, damp towel and let rise for another 20 minutes. (I actually skipped this step, the crust ended up being crispy and we loved it)
- At this point you can refrigerate the dough if you’re not using it right away.
- Preheat oven to 400. If you have a pizza stone, put it in the oven while it preheats.
- Roll the dough into a 10-12 inch circle (depending on how thick you want the crust) Pinch the sides to form a slightly raised crust. Brush 1 tablespoon of oil on the top of the crust.
- When you’re ready to bake, add your favorite toppings, and then bake for 20-25 minutes.
Pickled Red Onions
(From the Kitchen)
1 medium red onion, about 5 ounces
1/2 teaspoon sugar
1/2 teaspoon salt
3/4 cup rice vinegar, white wine vinegar, or apple cider vinegar
Flavorings (optional):
1 small clove of garlic, halved
5 black peppercorns
5 allspice berries
3 small springs of thyme
1 small dried chili
- Slice the onions: Start 2 or 3 cups of water on to boil in a kettle. Peel and thinly slice the onion into approximately 1/4-inch moons. Peel and cut the garlic clove in half.
- Dissolve the sugar and salt: In the container you will be using to store the onions, add the sugar, salt, vinegar, and flavorings. Stir to dissolve.
- Par-blanch the onions: Place the onions in the sieve and place the sieve in the sink. Slowly pour the boiling water over the onions and let them drain.
- Add the onions to the jar: Add the onions to the jar and stir gently to evenly distribute the flavorings.
- Store: The onions will be ready in about 30 minutes, but are better after a few hours. Store in the refrigerator. They will keep for several weeks, but are best in the first week.
My laptop is currently being fixed so I’m on my tablet. I actually like my tablet, but I do miss my laptop. I was hoping to get it back today, but come to discover I had ordered the wrong part, so I had to order the right one, I hope he’ll have it back to me next week.
I’m not sure what it is, at the beginning of the week I had so much motivation to go through my yoga practice, but yesterday and today I just don’t. I forced myself through it yesterday and I’m glad I did, but today I’m not sure if I’ll go through it. I still have a few hours before I have to be on the train to go to my show so hopefully I’ll get a little more motivated. I’m currently writing this in front of my therapy light with Batman lying in a weird position on my leg.
Read Full Post | Make a Comment ( None so far )